House

House

Saturday, October 17, 2015

Outside Improvement

We've been splitting our time between inside and out but have gotten our front porch to a good place for the winter.  We still have some additional trim and finish work to do but the stone is in and grouted and now the columns are trimmed out so we'll probably wait on the other work until next spring.  Our contractor had wanted to use prefab column coverings but Brian decided to custom make the coverings instead and it ended up with a much more polished look.  It took some time to design and then make the trim but we're really happy with the overall final look.


First up - a little bit random but we had a cap made and installed over the chimney to ensure that we don't have any moisture or rodent/bird problems going forward.
Getting started on the columns.  We ripped Azek to fit the columns and attached it to the pressure-treated wood.  Then we used more trim to build out the rest of the trim.

Adding more detail to echo the Craftsman-style trim on the rest of the house

Moving along

Now working on the other side

Who decided to use four columns instead of two?  Starting over again on the other side.

Now that's looking nice!

And a close-up.  Still a good bit of finish work to go on the porch at large but we'll call this finished for now.


Monday, October 12, 2015

Barefoot Friendly

With a couple weekends of rain, we moved to indoor projects and started installing the hardwood floors in the kitchen.  We chose an extremely wide plank (9 1/2") oak engineered hardwood for this house and so far, we love the way it's turning out.  There's a good bit of variability in the finished planks which gives the flooring a reclaimed wood look.  Because the planks are so wide, we're gluing and nailing the flooring.  It's a different install method than we used with the bamboo flooring on our last house (tar paper for vapor barrier and no glue) but hopefully this will work out well and keep everything in place without too much stress on the flooring.  Brian started the install using a PowerNail pneumatic nailer, which had worked perfectly on our prior bamboo floors, but found that it was creating the tiniest little indentations in the wood from the impact of hitting the nailer.  So, he then switched to using a Bostich trigger nailer, thereby increasing (again) our inventory of power tools in the house.

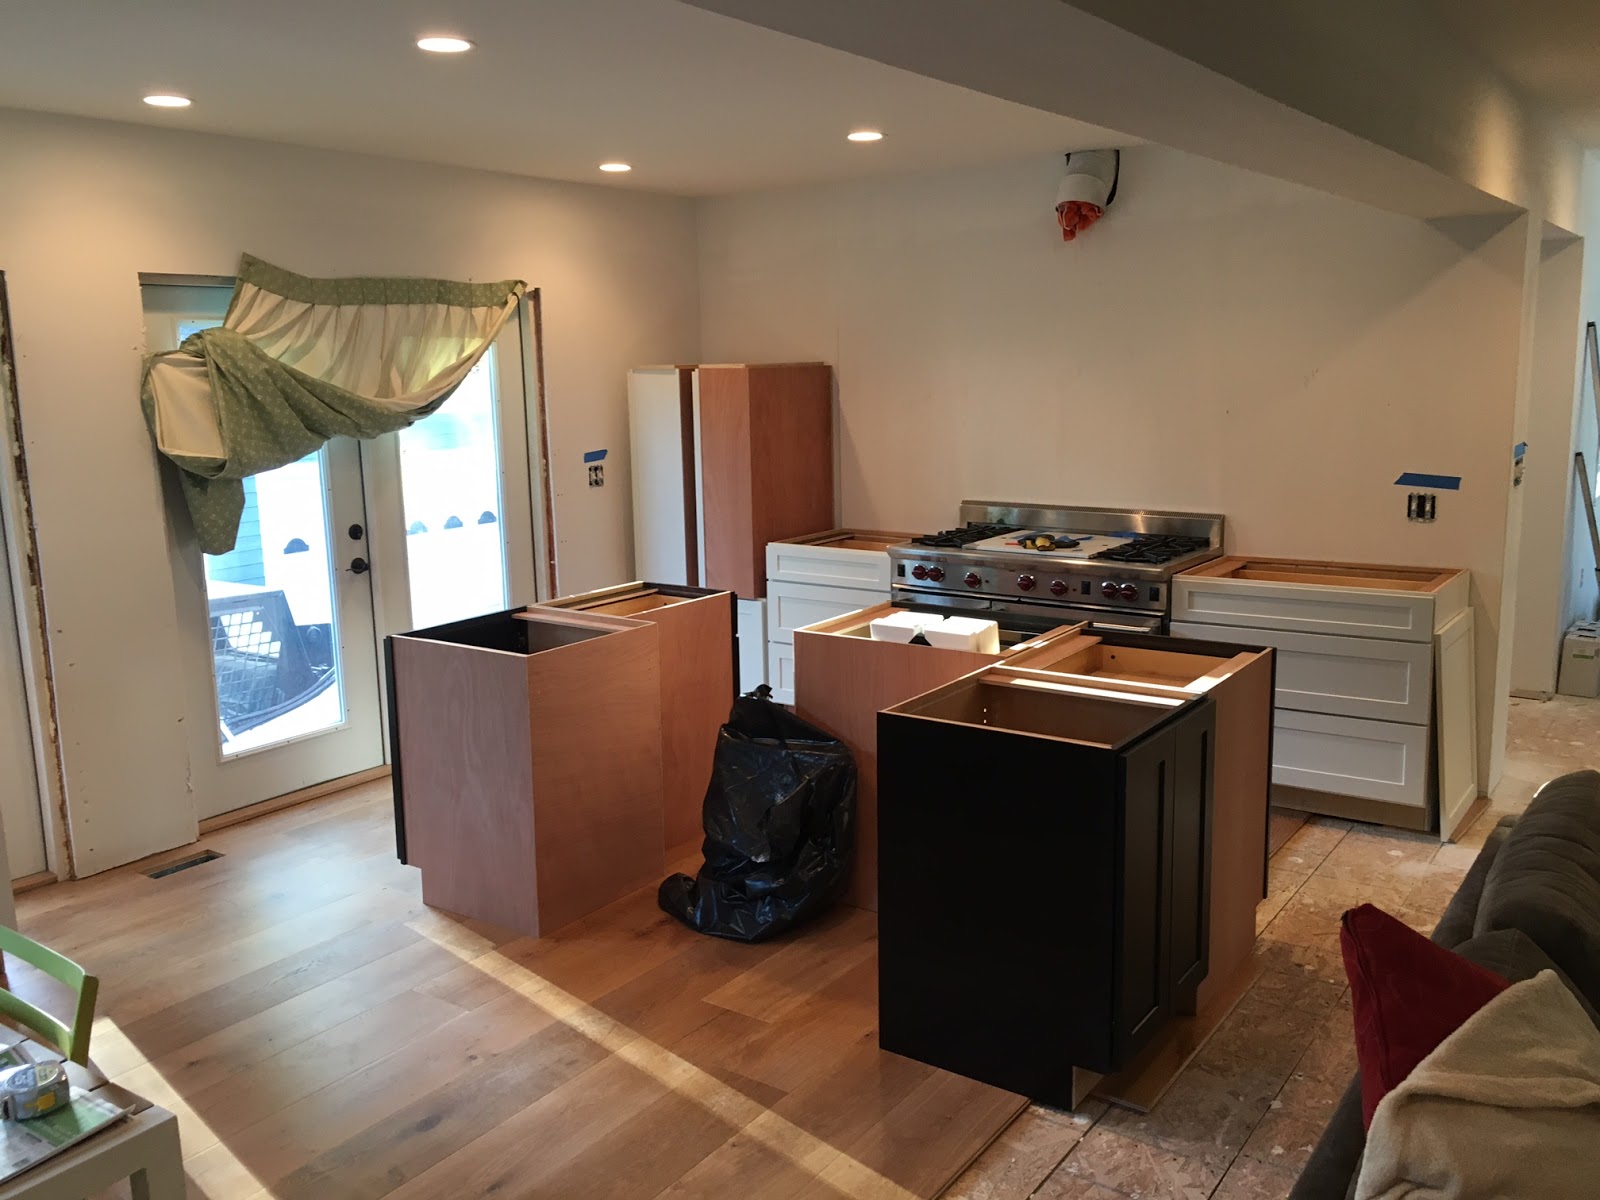
We also unpacked our kitchen and pantry cabinets, ordered from Cliqstudios.com, to inspect and move them very generally into place.  We went with Dayton white wall cabinets and espresso (or birch sable, in Cliqstudio-speak) island cabinets.  The kitchen space itself is quite big but it'll have a giant island and an eat-in table in it so it does not have that many cabinets - really just a relatively short wall of them, plus the island.  So, to provide extra storage, we're building an oversized pantry just off the kitchen with four 33" white base cabinets (and one 18" cabinet), plus we'll add a built-in wine fridge and open shelving on the walls.  As usual, I have a vision in my head...so now we have to see if it'll come together in reality too!  Off to the pictures...


A blank slate (complete with makeshift and very temporary window drapes) to start

Doing the prep work - planing and scraping the floors to make sure everything is nice and level


First row is always the hardest!  But it's worth taking the time to make sure the flooring is in straight.

Moving along now - these wide planks go in fast.

We paused to install the Wolf range so that we could floor around it.  Because the range sits up a bit higher than the countertops, we wanted it to sit on the subfloor.  Also, it's so heavy that it would be hard to get it in place without scratching the floors!  That odd garbage-bag covered mound in the middle is the Pex water pipes for the sink (covered to protect them from UV rays)

Suddenly this is starting to look like it might be a kitchen someday!  

Approximating where the cabinets will go...
Moving into the pantry with the flooring

Lots of extra space here!


Sunday, September 27, 2015

Outdoor work

We've been taking advantage of the great fall weather to finish up some outdoor projects, including grouting the stone porch.  As so often happens with DIY projects, it took about twice as long as I would have thought (I very nearly suggested doing it one evening this past week...since it wound up taking about four to five hours total, that would have been a very long night).  Of course, a good part of that was drying time between tooling the grout but still - even just piping in the grout was more work, more difficult, and took longer than expected.  We were too busy to take pictures but we took two grout bags (which are an actual thing! which I did not know before this week) and piped the grout into each and every gap.  It was kind of like decorating the world's most solid cake.  Fortunately, the other project - ripping down the back fence - was faster and easier than expected thanks to the bobcat.  We bought the forklift attachment because it came with the bobcat, not because we necessarily were looking for it, but I have to say that it's turned out to be one of the more useful tools in our garage.  Putting the forks through the chain link and lifting turns out to be a very effective way of ripping a fence out of the ground.  And, of course, there's very little that the bobcat can't pull out with some tow chains.  All in all, it made quick work of it.  We may not install a new back fence until next spring but we wanted to get the old one down now so we could assess the situation and foliage and plan out our next move.  So that was a good task to finish up.  And now, for pictures...

I realized I neglected to post an "after" picture of the bathroom tile from a few weeks ago so...better late than never!  Here it is with the white grout.
Installing the capstone on the stone columns.  We used two 36" x 12" pieces of 1 1/2" thick Pennsylvania slate.  In order to get the right amount of overhang, we shaved about an inch off each slab's width and then cut out the wood posts.
Awaiting grout but stone installed 
And from the other side
Now with grout!  To get a slightly darker grout color, we added 1 tablespoon of black cement color to each 50 lb. bag of grout
And the other side
And from the front (complete with our very makeshift "walkway" consisting of the old concrete path, torn up and moved compliments of the bobcat, of course)
I forgot to take a true "before" but here's the back fence when we just started pulling down the old wood and chain link.  The house behind us is about to be demolished for a new build, so they have a dumpster (and we don't have any neighbors and therefore no loss of privacy with the removal of the fence)

Go, bobcat, go!

The quick way to remove a fence...

Tuesday, September 15, 2015

SMOTY


Stone mason of the year. At least on this project. Stone work isn't particularly hard, but it does require a lot of trial and error. Like putting together a jigsaw puzzle. You want it to look random and not perfectly designed. Mission accomplished? We've spent a few hours here and there on the weekends and a few nights this week finishing up. Stones are all mortared in and the tops are cut flush. Finally the porch stone is ready for grout and trim. Hopefully this weekend we will finish the stone bases completely. Adding some major curb appeal!


Sunday, September 6, 2015

Tile Time

We've been working away at installing one of the upstairs bathrooms so we can relocate to the second floor and finally escape the basement - where we have been living for 10 months!  When we moved down here last November, we didn't have a good idea of how long it would be before we lived above-ground again...and that was probably a good thing because I'm not sure I would have been very excited to commit in advance to basement living for nearly a year.  Of course, the top two floors are still a long way from complete but even partially finished above-ground space will be an upgrade in my book.  We did ourselves no favors on this first bathroom by deciding on a somewhat ambitious tile pattern - brick surround with a herringbone inset and marble mosiac picture frame.  Had we done something more simple, we could have knocked this out in a day or two.  Instead, we've been working away a bit every night and this weekend.  We used two different sizes of subway tile for the bathroom - 4 1/4" x 10" for the brick pattern and 3" x 6" tiles for the herringbone.  Although it's more time-consuming, I'm glad we did it as it's a nice combination of classic look with a custom touch.  And now for pictures...


Getting started with the brick pattern - we used a ledger board on the sides to make sure the lines stayed straight

Brick pattern almost complete

Working our way through the brick pattern and getting started with the inset

Finally!  Tile in, next step - grout

Saturday, August 29, 2015

This and That and Back to DIY

We're working our way through a number of different projects here, so we don't have any "after" pictures to share at the moment but there are a number of "before" and "in progress" pictures.  We also said goodbye to our contractor this week - we'll take over from here to get the finishes done the way we want them.  So, we are officially back to true DIY!  And without further ado, a whole list of projects in progress:

First up - we picked up the hardwood for our floors, all 2600 plus square feet of it!  It added up to 91 boxes, which, at 60 pounds a box, gave the truck, and us, a good workout.

In order to get it into the house, we set up a little relay system.  We moved the boxes from the trailer onto a pallet, used the bobcat to deliver the pallet into house, shifted the boxes onto a furniture dolly, and then wheeled the boxes into various rooms to unload them.  It was a lot of steps but, fortunately, not too much lifting - mostly just moving the boxes from one place to another.  It's a good thing Brian is a pro with the bobcat though - there's not much clearance on this delivery system!
Also in the flooring category but not hardwood - we're moving forward with tiling one of the bathroom floors, starting with prep for self-leveling compound

Nice and level for tiling!
Tiling in progress.  We went with a dark wood-like tile for this en suite bathroom because the bedroom will be carpeted.  The floor is finished now but we forgot to take a picture so that'll have to wait for another post...
We also had a big order of stone delivered this week, including two very large boulders that we'll incorporate into the backyard landscaping...when we finally get around to landscaping.

Hello pretty boulders!  And several pallets of stone for the porch.

Also working on finishing the back stairs.  These are being finished with maintenance-free Trex in Woodland Brown.

And now that the stone is here, we got started on the front porch too.  Building up the base for the stone columns here.


Putting the stone on the base of the porch.  We're using ashlar cut stone veneer in Coyote Gray.

Working our way around the porch

Laying out a pattern for the landing.  Here we're using a bluestone in silver gray.  We'll add the stair treads once the rest is done.

Setting the stones

Almost done!  More "after" pictures once the grout is in.