House

House

Saturday, August 19, 2017

Variety is the spice of life

In the spirit of catching up on assorted projects in real life and on the blog, here is a rather random selection of projects we've been working on recently.  First up - more landscaping.  We had previously laid sod in our side yard when we did the front yard, but we weren't happy with the slope or the drainage so decided to fix it once and for all (we hope!).  That meant digging a trench to bury a drain pipe from the roof gutter, regrading the yard, and laying new sod over the top.  Since we finished this project several weeks ago, I'm happy to report that the grass is alive and well and, despite the record-setting rain we've had this summer, the yard seems to be draining very well.  So, another thing off our list...and now up on the blog as well!

Getting started, regrading and laying a drainage pipe

All covered up

Since we didn't need all that much sod, we skipped delivery - it's good to own a pickup truck!

New sod installed and ready (and in need of) watering
Next up - we've been working on finishing the Jack and Jill bathroom on the second floor.  This bathroom is very nearly done at this point but we haven't taken proper "after" pictures yet, so here are some in-progress shots.

Working on installing the granite and the sinks

Setting the sinks

This doesn't look quite ready for use yet...but it's getting closer!
We also went ahead and installed hardwood flooring in the room we call the second floor living room.  This is a flex space that can be used for an office, a kids playroom, or a sitting room but, before it can be used for anything, it needed to have flooring and trim installed.  This was one of those surprisingly satisfying and relatively quick projects - we were able to install the flooring and the trim in one weekend.  And since it was the last room on the second floor that was wholly unfinished, with this project done, we're feeling like the second floor is getting much closer to being complete!

Getting started with leveling the floor

That was fast!  Nearly done with hardwood installation

And now with flooring and window/floor trim installed.  Next up - paint and furniture!

Friday, August 18, 2017

Catching up

It's a little daunting to write a post after several month without one...and there is much progress to report on!  I'll just group some projects together and try to keep catching up over the next few days.  But starting with where we left off, we first tackled finishing the fence to completely enclose the backyard.  Happily, the trees that we moved are still alive today and now our yard is dog-friendly!

Getting started with setting posts

So many posts


And skipping ahead - voila, a fence!

From our side - all fenced in 

This was the tricky part - we had to build around a big tree near the property line


So we built a custom frame

And then custom cut the fence boards

And now the fence goes up to, but not through, the tree.  We did the same thing
 on the other side so the fence now goes right around the tree

That left just a gate to build

We adapted a steel frame kit for the big gate

Getting the gate laid out


And setting it up


Skipping some steps to the final product

A little trim work to be done but we are now fully fenced in
And we immediately invited our friend's retriever Charlie over to enjoy the yard!

Sunday, April 30, 2017

Moving Day (for trees, that is)

We're still here!  We've been working indoors on flooring and trim but with summer-like weather making an appearance, we moved outdoors to work on the backyard.  Two of three sides of fencing are up but we have one to go - and of course, it was the side with many trees and the ubiquitous chain link fence.  So, after removing the chain link, we had to take out the trees and - because we didn't want to chop them down - that meant putting the bobcat back to work!

"Before" picture - note the tree and large bush/tree to the right

Another before shot - this will be a long stretch of fencing someday!
We were so busy taking down the trees that we forgot to take in-process pictures but did take some once the first tree came down.  We saturated the ground around the root ball to soften it up and then Brian used the bobcat forks to dig up the tree.  It's an unconventional use of the forks but Brian has become very skilled at using them to dig and pop out trees and chainlink fence poles.  This tree (which I'm calling a tree even though it might be a bush - I have no idea what it actually is) fortunately had a relatively shallow rootball and popped right out.

Here it is, laying on the driveway, thinking about where its new home might be

It is very, very large
Just how large this thing is became apparent when we tried to get it onto the bobcat to transport it to the back of the yard.  It is tall, heavy, and unwieldy.  We finally, after a couple of tries, managed to lift it from its side up onto the bobcat forks.  Once it was on the forks, we strapped it to the bobcat so it wouldn't fall over, and the bobcat carried it to the back of the yard.

Ready to take a ride.  I'm still not sure how Brian managed to see around it to drive
but the tree, bobcat, and Brian all arrived safely
Scoping out the new spot for the tree
Another shot pre-tree planting - you can see why we'd like a little more screening

And now with tree in place!  Much more private

Another angle
The poor tree took a bit of a beating with the bobcat forks (which are not an approved tree-moving method!) so we'll keep an eye on it and hope that it survives.  So far, with plenty of water, it seems okay so fingers crossed.

Then it was on to the next big tree.  This one also came out pretty easily and then when it was lying on its side, we realized just how big and heavy it was...

Getting it out of the ground turned out to be the easy part

We didn't want to drive the bobcat across the finished patio so had to come up with a different method to move it.  We settled on a rather unconventional approach involving a furniture dolly, some plywood, and a lot of lifting.  

Tree taking a ride on the furniture dolly to its new home in the corner of the yard
Getting this tree upright and into place was no easy feat and Brian may have come a bit close to being pinned a couple of times as I struggled to help hold up the tree as we wrestled it into place.  Fortunately, Brian's friend Tim showed up in the middle of this process.  Having an extra - and strong - person around made a huge difference and we were able to get it planted and in place.

Tree relocated into corner
The last part of landscaping was to plant three trees that I picked up on clearance at our local nursery - two Zelkova Serrata trees and one 'Homestead' Buckeye.  You can imagine the conversation when I told Brian I wanted to buy three (large) trees that would now need to be picked up, transported home, and planted.  But they were on sale and I couldn't resist.  Fortunately, Tim stuck around and helped dig the giant holes that we needed for the zelkovas - these are not small trees - and then move them into place.

Zelkovas waiting to be planted

And they're in!

It's a bit hard to see but the new buckeye is in back, between two river birches (which are also a bit difficult to see here as they haven't leafed up fully yet) - but the overall effect is that the fence line is quite wooded at this point
And the last thing to do was clean up the side yard to prep it for the fence.  In the next few weeks (or perhaps longer!) we'll start getting the fence up and in place.  But with two trees moved and three new trees planted, we've had a good weekend!

Looks a lot different now - and definitely ready for a fence!

Sunday, February 12, 2017

A place for everything

It's been a few weeks since we've posted but we've been working on one of my very favorite projects, the master closet!  After much thought and debate, we decided to use pre-built boxes to customize the space.  On the last house, we completely custom-built the master bedroom closets (along with most of the other closets), using nothing more than plywood and 1x2 trim - and while we were very happy with the end result, it took a fair bit of time to custom build, paint, and finish everything.  This time, we have an even larger master closet and wanted even more customization so it would have been an even bigger project to do from scratch.  At the same time, we just couldn't bring ourselves to pay someone else to build a custom closet for us so the solution, surprisingly (to me anyway), was to use Ikea's Pax system and customize the installation.

We started with a blank canvas - just your basic room here.  The later pictures get a lot better as we finally bought a little attachment to turn an iPhone camera into a wide angle lens, which makes it much easier to photograph rooms like this.  But for now, this will have to do.  Nothing to see here but blank white walls anyway!


We knew we wanted to use a very dark gray trim so up went the paint swatches:
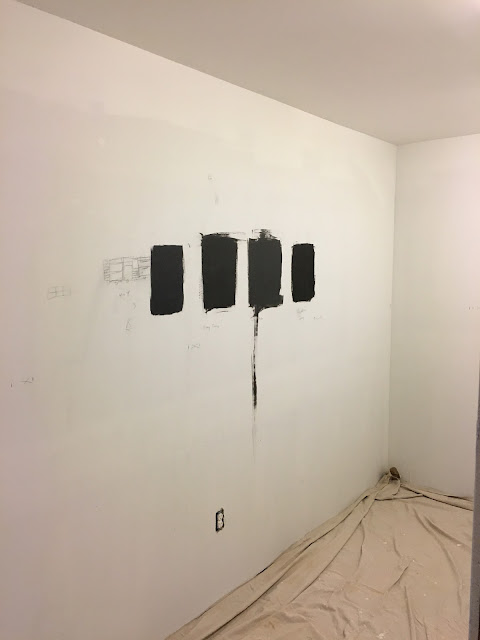
These are (from left to right): Restoration Hardware Flint, Glidden Gray Tabby, Behr Dark Ash, and Behr Asphalt Gray - they all look really similar to each other but we ultimately went with the most black/gray, which was Behr Asphalt Gray
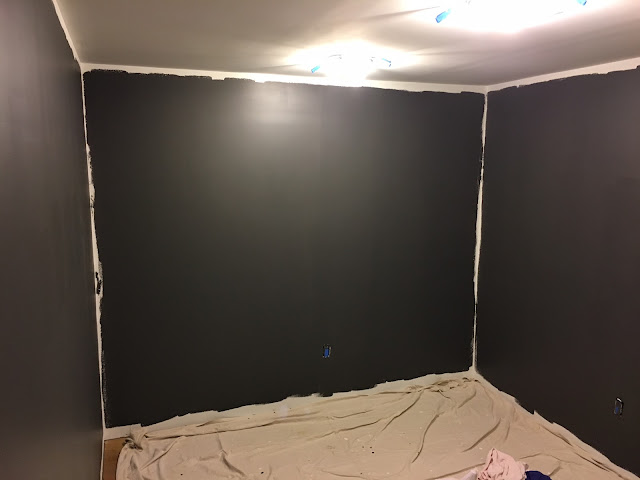
Once we had a color, we painted all three walls that would have boxes so that the backs match the trim:

No going back now!

This is suddenly a very dark room
Next up - building the boxes - because of their height (we used the 93 1/8"), it was easier to build them in place.  We skipped the backs so that the dark walls would be visible and added a brace at the top of each box, which provided better stability than the rather flimsy backs that are included.
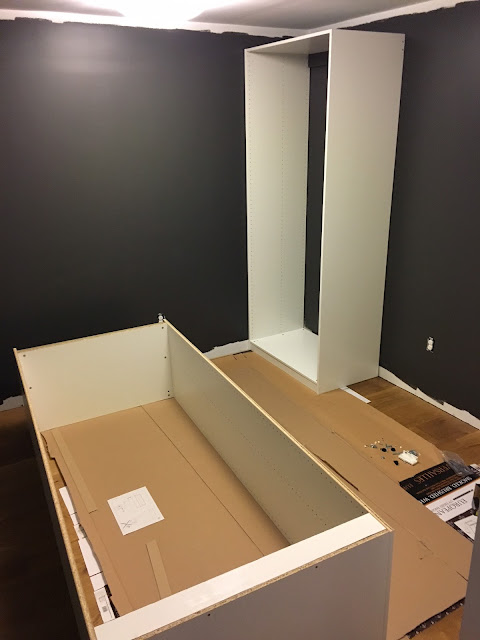

Two down, many to go


Getting all the boxes in place and starting to space them out

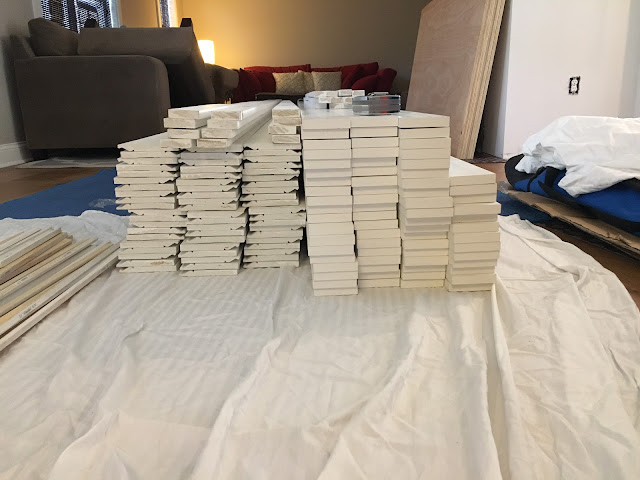
Before we started adding trim, we put a first coat of paint on the 1x3 trim.  We placed a big order of floor and window/door trim, along with the closet trim, so suddenly our living room turned back into a storage facility:
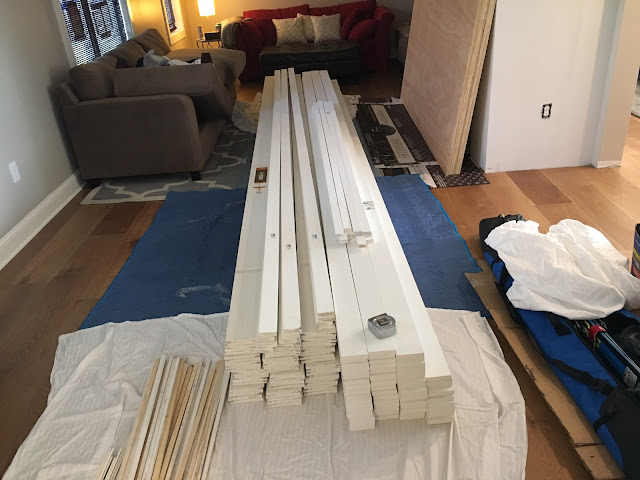
This is a lot of trim

We'll be busy for the next few months!
Setting up a painting station for trim
Now that's the right color!
We spaced out the boxes so that 1x3 trim fit the sides and 1x4 is on the top and bottom.  We'll add crown moulding to the top as well for a full built-in look but that will come later.

With top and bottom trim

And now with sides
Using the wide angle lens

Halfway there 

Trim in place


Next up was adding the shelves and drawers.  We forgot to take pictures before we moved all our stuff in so...this will have to do!  We went with a mix of hanging spaces, drawers, and shelves and it has increased our storage space dramatically.  Since it's one of the few closets we have finished so far, it's stuffed with lots of stuff that might not otherwise be in the master closet, but happily, everything still fit.  It's a huge improvement and we're really happy to have this project nearly finished.